How to Prepare Your Garden for Spring Planting
As winter bids farewell and the weather gets warmer, you know it's that time of the year for your garden to come back to life. But prior to getting ready to direct sow or transplants into the ground, you need to make sure that everything is well organized.
So in this guide, my goal is to help you know how to prepare your garden for spring planting. Mainly, preparing a garden for spring planting focuses on preparing the soil by testing and turning it over, removing weeds, and so forth.
Well, there's actually a lot of tasks to do and it can be easy to forget some of the things that need to be done to obtain a successful harvest. So here I've rounded up the crucial tasks you mustn't miss to jump-start on spring garden planting.
This post contains affiliate links. Whenever you buy something through one of these, we get a small commission without any extra cost to you. Thank you !
Soil Preparation
Soil preparation is the key factor to prepare your garden. Doing it properly will promote the growth and development of your plants. It will also reduce the maintenance required after planting. Here's what I suggest you do when preparing the soil.
Clear surface of the soil: When preparing soil start by clearing the surface of any rocks, debris, fallen branches, and weeds. When you pull out weeds, make sure to get them out at their roots so that they won't grow back and compete with your plants. Then dead leaves can go on the compost pile for later use or can be used for mulching. And this can cut the costs of buying compost or mulches.
Test Your Soil: In order to do soil preparation effectively, you must test your soil before planting. This is the only way to determine the level of nutrients your soil contains and by this, you'll know what exactly your soil needs to be productive. You can get soil test kits online or from gardening supply stores. If you don't want to DIY you may also be able to send soil samples to a soil sampling company. This would be an added advantage for getting accurate recommendations for fertilizer applications from an expert.
Turn Over the Soil: Once you've cleared the soil surface and examined your soil, you can break and loosen it with a tiller or shovel. Make sure to break up any large clods until all the soil has a similar consistency. But before tilling you need to evaluate how wet the soil is. When it's wet, wait until it dries out enough to avoid further compaction and damaging the soil structure. If it's your first time planting, try to contact your local utility company to confirm if the area you're planning your garden doesn't have electrical wires or pipes underground. NB: If you are using the no-till method, you can skip this process.
Decide if You'll Start From Seeds or Seedlings
Due to different circumstances, you may start from seeds or seedlings. When starting from seedlings, know where should you get them. I recommend you to buy from a reliable source to avoid failure. Also when buying seedlings, don't buy too early because you’re going to have to take care of seedlings that whole time. So it's best to buy right before you’re going to plant.
Then when starting from seeds, first of all, you have to separate seeds packets into 2 piles, those that will be direct sown outdoors and others to start indoors. (For detailed information on starting seeds indoors, check out our article How to Successfully Start Seeds Indoors)
Sorting your packets into piles accordingly will make it easier for you to start certain seeds at the right date and know how long it takes the seeds to germinate. So make sure to read the instructions on the seeds packet. If you don't understand provided information, you can approach the seed company for further clarification.
Install Plants Support
If you plan to grow plants that thrive best when supported or need something to climb, you should set the supporters prior to planting. In this way, the plant grows through the support because waiting until plants are in may disturb their roots. And the more the roots are disturbed, the more the plant's ability to feed itself is impacted.
There are several plant support used including trellises and cages. So it's important to understand the use of each and which type of plant needs support to grow. By providing supports, your plants will be less susceptible to disease as foliage that typically carries disease will be off the ground. Supports are more than just for leaning and climbing on but they can even make it easier to reach and harvest your produce.
Get Rid of Pests Before Planting
As temperatures warm up, many pests come out of their winter hiding spots and into our gardens. Fortunately, there are plenty of methods you can use to prevent pests which include mechanical, physical, chemical, cultural, etc. And these methods can be used according to the type of pest that you want to get rid of.
When looking at combating pests before planting, you have to use preventive measures instead of protective (people oftentimes confuse this). In the aforementioned solutions, cultural and mechanical methods work best at this point.
Culturally, you can plan to practice crop rotation or grow pest-resistant varieties. And mechanically, you can pick pests larvae by hand and destroy them, or cut off the parts of existing plants that are infested. Mostly infested plants are seen by discolored or curled foliage.
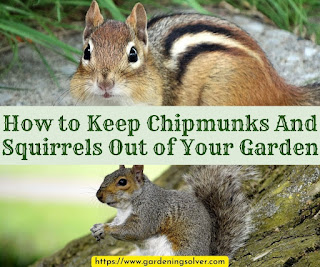
Furthermore, rodents are another pests that are a lot of trouble in the garden. These are known to reproduce quickly. Therefore if you have a large rodent problem try to set a barrier earlier. I recommend you to install a sturdy wire mesh, make sure to opt for one with a very small gap. Also, try to remove their hiding and nesting places.
N: B For very destructive and stubborn pests, you must call a licensed professional pest control company. This will save you money and trouble in the long run.
Clean Your Garden Tools
Starting spring which is a busy season requires a thorough cleaning, sharpening, and lubricating of your garden tools to maximize their functionality and effectiveness. This is the most overlooked task but it's important to do it as to not spread disease in your garden. And maintaining your tools helps them last longer.
Most larger tools get rust from winter moisture. You can remove accumulated rust with medium-grit sandpaper. If they have moving parts, ensure to disassemble them first. For stubborn rust, you can use fine steel wool or rust remover.
After cleaning and removing rust, gather essential kits for sharpening. And once your tools are sharpened, you can make the final touches by lubricating to prevent rust. Don't forget to wear protective gear when cleaning your tools to avoid injuries.
If you want to disinfect your tools, mix a ratio of 1 part bleach solution to 9 parts of water and do a half hour soak. This will help to kill bacteria, fungi, and viruses. Before disinfection, thoroughly clean dirt on your tools. When all is done, keep your tools organized to avoid headaches when trying to get tools.
Think About Mulch
Around mid to late spring when plants are just starting into growth, you'll need to spread a thin layer of mulch throughout your beds. Therefore you need to plan ahead on which type of mulch will you going to use between organic and inorganic.
When using organic mulches, you'll just add the new layer on top of last year's mulch. But if it has not been able to decompose properly, you can clear that old mulch beforehand. Organic mulches play an important role in providing nutrients to the soil even though it need to be reapplied or topped off. But if your main purpose is to suppress weeds, you can think of inorganic mulches.
Related Questions
When should I start preparing my garden for spring? Early spring is the best time to start preparing your garden for spring. But ensure the soil is workable to avoid damaging soil structure. Preparing your soil properly and at the right time will make it easier for plants' roots to grow, process nutrients, and get enough oxygen they need to stay healthy.
How long does compost take to mature? It can take 4 weeks to 1 year for compost to be ready-to-use, depending on what you've composted as well as the size of your compost pile.
Should I plant first or mulch first? It is best to plant before mulching. This will make it easier for you to reach soil level when planting and soil clumps won't end up on the surface of the mulch.
To Sum Up
Hope this helps you to understand how to prepare your garden for spring, and by following these tips you won't be disappointed with your garden. You'll absolutely get the best yield throughout the growing season. In short, when all these major tasks are well prepared, the hardest part of gardening is also done.
Happy Gardening!!


Comments
Post a Comment
Have something to say? Feel free to leave a comment.